Adobe Magazine Sep/Oct 1995 Acrobat Q&A

Adobe_Magazine_May_June_1995_Cover
Adobe Magazine September/October 1995 Cover

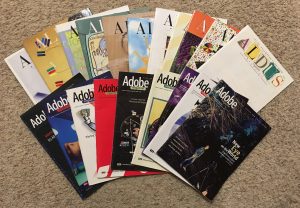
For a few years I wrote PageMaker and Acrobat Q&A sections for Adobe Magazine. This is Acrobat Q&A section I wrote for the September/October 1995 issue.

I wrote the PageMaker Q&A article for the May/June 1995 issue. I’m not sure if this issue, or the July/August 1995 issue which got lost over the past couple decades, contains the first appearance of the Acrobat Q&A section. I’m searching for the missing issue on eBay to find out. For now, this is the earliest Acrobat Q&A article in my nostalgia magazine collection.

A few time-capsule notes:

  • This article mentions the soon-to-be released Windows 95.
  • Each question usually lists the operating system for which it’s relevant. This issue is the first to add DOS and Unix to the familiar list of Windows (formerly referred to as “PC” in the magazine) and Macintosh.
  • There are references to the old AUTOEXEC.BAT and WIN.INI files. I remember gingerly helping customers edit those delicate files on the phone and haven’t seen their names in print in years.
  • Going forward from this issue, the Q&A sections are much shorter than they were in previous issues.

The article is scanned into Acrobat and its OCR functionality was used to recognize the text. While OCR is a wonderful invention, the cleanup process (I pasted the content into Word and did it there) is more time consuming than expected. Note that Adobe Magazine didn’t provide bylines for Q&A articles, though the authors are listed as contributors in small print in the credits, as can be seen on the last page of the scanned PDF at the bottom of this post.

Q: I’m trying to install the Acrobat Reader in Windows and keep getting an error message with the number 0003 in it. Why won’t it install? (Windows)

 A: You’re probably having this problem because your TEMP directory is invalid or the disk it’s on is full, making it impossible for the Acrobat Reader to store files in this directory during installation.

When you run the installer application for Acrobat Reader for Windows (ACROREAD.EXE), it makes a copy of the ACROREAD.EXE file in your TEMP directory, which is usually defined in the AUTOEXEC.BAT file’s “SET TEMP=” line. When the directory listed in that line doesn’t really exist, or you don’t have write access to that directory, or that directory’s drive doesn’t have enough free space, the Acrobat Reader installation fails and returns the error “Error *** 0003 ***.”

To prevent this, there are a few things you should do. First, ensure there is at least 4-8 MB of free disk space on the hard drive on which you’re installing Acrobat Reader, as well as the hard drive that contains your TEMP directory.

Next, check to see that the “SET TEMP=” line in your AUTOEXEC.BAT file points to a directory that actually exists. If it points to an invalid directory, make a backup copy of your AUTOEXEC.BAT file, then edit the line to point to a different directory—any one will do, as long as that directory really exists, isn’t your root directory, and is on a hard drive that you have write access to and has at least 4-8 MB of free space. Furthermore, we recommend designating a directory that will be used only for TEMP files (for instance, C:\TEMP), not a directory you use to store other items. (If you need to create a new directory for this purpose, you can use the Windows File Manager or DOS commands to do so.) When you’re done, save your AUTOEXEC.BAT file in text-only format, restart your computer, and try installing the Acrobat Reader again.

One more note: if you’ve been operating with an invalid TEMP directory, you probably have a few TEMP files (named with .TMP extensions) cluttering up your hard drive. Unless one of those TEMP files might contain valuable data, which is only likely if you’ve lost an entire document due to a system crash, you can delete them. To do so, exit Windows completely first (this is extremely important, because you should never delete TEMP files while Windows is running—you might delete one Windows is in the process of using). Then, use DOS commands to delete the files.

Q: What are the advantages of embedding fonts into a PDF file, and how do I do it? (Windows/Mac)

A: Acrobat can embed PostScript Type 1, multiple master, and TrueType fonts (Acrobat embeds TrueType fonts and each instance of a multiple master font as individual Type 1 fonts). When you embed fonts into a PDF file, the Acrobat viewers (Acrobat Reader and Acrobat Exchange) will be able to display and print your PDF file with the exact fonts you used in your design, even if they’re not installed on the computer you’re using to view the PDF.

When you don’t embed a font, Acrobat Reader and Exchange must create—on the fly—a simulation of that font if it isn’t installed on the computer being used to view the PDF file. The Acrobat viewers create these simulated fonts by reading the metrics (exact character spacing values) of your original font, which the Acrobat PDFWriter or Distiller embed in your PDF. Then the Acrobat viewers, in conjunction with ATM (Adobe Type Manager), use the “AdobeSansMM” and “AdobeSerifMM” multiple-master fonts to synthesize a font with the same metrics as your originals.

Embedding fonts in your PDF files ensures that they’ll retain the exact look and fonts of the document from which they were created, but doing so will also increase the size of your PDF files. Not embedding fonts will keep your PDF files relatively small, but they’ll take slightly longer to display on screen, since Acrobat and ATM will need to create on-the-fly simulations of your fonts. And although those simulated fonts will retain your original document’s layout and line endings, they won’t look exactly like the original fonts. Note that by default, both PDFWriter and the Distiller will embed fonts with nonstandard, non-Latin (symbol) character sets—for instance, Zapf Dingbats or the Symbol font—since simulated versions of those fonts won’t match the original fonts’ characters. (Decorative fonts like display or script faces are not automatically embedded.)

You can control which fonts will be embedded in your PDF files by using the font-embedding options in the PDFWriter and in the Distiller. Here’s how.

Getting to font-embedding options with the PDFWriter. How you get to the font-embedding options in the PDFWriter depends on what platform you’re using. In Windows 3.1, go to the Control Panel, click on the “Printers” icon, select the “Acrobat PDFWriter” device, click on the “Setup…” button, then click “Fonts….” In Windows 95, double-click on the “Acrobat PDFWriter” device in the “Printers” Control Panel, and in the “Acrobat PDFWriter” window, select “Properties…” from the Printer menu. In the “Details” section of the next dialog box, click on “Setup…,” then “Fonts…” (at the time of this writing, Windows 95 was not yet released, so this procedure may change).

On the Mac, hold down the Control key while selecting “Print…” from the File menu. In the “Print” dialog box, click on “Setup…,” then “Fonts….” (Note: Some Macintosh applications, such as Adobe Persuasion and Microsoft Word, provide access to printer-setup options via a “Page Setup”·dialog box. In these applications, hold down the Control key while selecting “Page Setup” from the File menu, and in the “Page Setup” dialog box, click on “Fonts….”) If neither of these procedures gets you to the “Acrobat PDFWriter Font Embedding” dialog box, check the “PDFWriter Shortcut” Control Panel to make sure it’s not disabled or set to use another keyboard shortcut. If the “PDFWriter Shortcut” Control Panel isn’t installed, you’ll need to select the “Acrobat PDFWriter” printer driver in the Chooser manually.

Getting to font-embedding options with the Distiller. To open the “Acrobat Distiller – Font Embedding” dialog box, select “Font Embedding…” from the Distiller menu.

Using the font-embedding options. With the options in the “Font Embedding” dialog box, you can control which fonts Acrobat embeds in your PDF files. The manual and help files that come with Acrobat provide comprehensive information on using these features—for details, see the Exchange help file HELP_E.PDF (Windows) or “Help­Exchange.pdf” (Mac), pages 138-40; the Distiller help file HELP_D.PDF (Windows) or “Help-Distiller” (Mac), pages 71- 77; or the Getting Started manual, pages 28-32. For technical information on font embedding, refer to FaxYI documents 4406, “How the Adobe Acrobat Distiller and PDFWriter Programs Handle Fonts,” and 4408, “Acrobat Viewer Font Management Tables” (see pages 118-19 in this issue for information on how to use FaxYI).

Acrobat Tip (Windows/Mac/DOS/Unix) – Searchable graphics

Acrobat Exchange and Reader let you search for text, but have no built-in feature that’ll let you search for graphics. But don’t let that stop you—you can create “searchable” graphics as long as you plan ahead.

While you’re in your authoring application (whatever program you used to create the document you’ll convert to PDF), place some descriptive text behind the graphic you want to be searchable. You can usually do this by typing the text, selecting it, and using a “Send to Back” or equivalent command. Once the PDF is created with either the Distiller or PDFWriter, Acrobat Exchange or Acrobat Reader will “see” the text, even though it’ll be invisible to someone viewing the PDF file. Here are a few tips:

  • Use appropriately descriptive text (for instance, “Space Needle” behind a picture of Seattle’s Space Needle landmark).
  • If you use a small point size, you may be able to include a few different search words. Make sure the text is small enough that it’s completely hidden by the graphic.
  • To prevent adding a font that’ll need to be embedded in your PDF (thereby increasing its file size), use a font that’s already on your page, or use a font that Acrobat won’t embed—for instance, Times or Helvetica. (Acrobat never embeds Times, Helvetica, Symbol, or Zapf Dingbats, since those fonts get installed automatically with Acrobat Reader and Acrobat Exchange.)

Acrobat Tip (Windows/Mac/DOS/Unix) – Free software!

PDF files are easy to share with friends and colleagues—as long as they can read them, which requires that they have a version of the Acrobat Reader for Windows, Macintosh, DOS, or UNIX. Fortunately, the Acrobat Reader application is free, and you can distribute it to whomever you like as long as the copies contain the Electronic End User License Agreement and the same copyright and other proprietary notices that appear on or in the software. Here are a few of the places you can get the Reader.

On the internet: Check out our World-Wide Web home page at http://www.adobe.com/ or use our FTP server at ftp://ftp.adobe.com/pub/adobe/Acrobat.

Adobe’s free BBS: Using a modem and telecommunications software that supports VT-100 or ANSI emulation, and that’s set to 8 data bits, 1 stop bit, and no parity, dial the free Adobe BBS at (206) 623-6984. For more information on this service, see pages 118-19. You’ll find the Acrobat Reader under “Adobe Acrobat” in the File Library section of the BBS.

America Online: The Acrobat Reader is available in a variety of America Online forums, including the Adobe forum (use the “ADOBE” keyword).

CompuServe: See the Acrobat Showcase forum—use the “GO ACROBAT” command to get there.

If you don’t have a modem, you can order the Acrobat Reader directly from Adobe. Ask for the Acrobat Sampler CD, which contains the Acrobat Reader for Windows, Macintosh, DOS, and UNIX, as well as sample PDF files. The CD is available for a shipping and handling cost of $9.95 (U.S.). The Macintosh and Windows Readers are also available on 3.5-inch high-density floppies for a shipping and handling fee of S9.95 (U.S.). Call (800) 521-1976 for more information.

The scanned article complete with images and nostalgic advertising:


Adobe Magazine Sep:Oct 1995


This post is brought to you by
* Arve Henriksen - Chron
* Glenn Branca - Symphony No. 9: L'Eve Future
* Kara-Lis Coverdale - Sirens
* Urge Overkill - Rock and Roll Submarine (better than most folks think)

Adobe Magazine May/Jun 1995 PageMaker Q&A

Adobe_Magazine_May_June_1995_Cover
Adobe Magazine May/June 1995 Cover

For a few years I wrote PageMaker and Acrobat Q&A sections for Adobe Magazine. This is the May/June 1995 column and the final PageMaker Q&A column I wrote before starting the then-new Acrobat Q&A column.

The article is scanned into Acrobat and its OCR functionality was used to recognize the text. While OCR is a wonderful invention, the cleanup process (I pasted the content into Word and did it there) is more time consuming than expected. Note that Adobe Magazine didn’t provide bylines for Q&A articles, though the authors are listed as contributors in small print in the credits, as can be seen on the last page of the scanned PDF at the bottom of this post.

This series of questions and tips includes information about old Network Copy Detection (NCD) issues, converting PageMaker publications to PDF (which makes sense given the recent Adobe acquisition of Aldus), and more. You really know this is old when you run across references to CompuServe and America Online.

Q: Whenever I try to draw a rectangle or oval in PageMaker, I get a perfect square or circle—what’s the deal? (PC)

A: Normally, if you want to draw a perfect square or a perfect circle, you use the rectangle or ellipse tool while holding down the Shift key. If you’re getting perfect squares and circles even when you don’t have the Shift key held down, chances are your problem is being caused by an old driver (dated 1/11/93 or earlier) for a Logitech three-button mouse. To fix it, update the Logitech driver to version 6.24 or later. To do so, download the most current version of MOUSE.COM and LMOUSE.DRV from the Logitech forum on CompuServe (type GO LOGITECH) or from Logitech’s BBS (510-795-0406)

Q: I keep hearing about PPDs. They sound pretty important, but I don’t quite understand why. What exactly are they? (PC/Mac)

A: PPD (PostScript printer description) files are text-only files, written in the PostScript language, that describe the model-specific characteristics of PostScript devices (printers, imagesetters, and so forth). PageMaker and other applications that use PPDs rely on these files to give them the information they need to print correctly and efficiently to PostScript devices.

When you print from PageMaker, you should select the right PPD file for your Postscript device from the “Type” pop-up menu in PageMaker’s “Print document” dialog box. If you don’t use the right PPD, chances are you won’t be able to take advantage of all your printer’s features, your jobs might print less quickly, and (in extreme cases) you could even receive PostScript errors.

Here’s a partial list of the model-specific features described in a PPD file and why PageMaker needs that information when it prints:

  • How much free virtual memory your PostScript device has. The free virtual memory setting in a PPD reflects how much RAM your PostScript device has available to produce the rasterized page descriptions of your files (“free virtual memory,” in this case, is actual RAM and has nothing to do with your printer’s hard disk). PageMaker uses this number to determine the most efficient way to download PostScript resources such as fonts. If you’re using a PPD that says your printer has less free virtual memory than it really does have, PageMaker might download, flush, and redownload fonts more frequently than necessary, thereby needlessly increasing your print times. If your PPD file has a free virtual memory setting that’s too high, you could experience PostScript errors.
  • What fonts are built into your PostScript device. PageMaker uses the PPD’s list of built-in fonts to deter­mine which fonts it must download. Using the right PPD with the right font list will ensure PageMaker can download the correct fonts for the fastest possible output without font substitution.
  • Your PostScript device’s paper options. PPD files include information about what paper sizes and trays your PostScript device supports, and whether or not it offers custom paper sizes. Using the right PPD file ensures you can take advantage of all your PostScript device’s paper features.

PageMaker 5.0 ships with dozens of PPD files—if you need to install one, just run the setup program “ALDSETUP.EXE” or PM5SETUP.EXE (Windows) or “Aldus Installer/Utility” (Macintosh) on the first PageMaker installation diskette. If PageMaker didn’t come with a PPD file for your PostScript device, there are several places you can obtain one. First, try Adobe’s free BBS at (206) 623-6984 and look in the “PPD files” folder in the “File Library” section. If you don’t have a modem, try the nearest Adobe Authorized Service Provider, who may download the file for you. If those options don’t pan out, try going directly to your PostScript device’s manufacturer, who can supply you with a PPD file or recommend one that’s a close match.

The information in PPD files reflects the model-specific characteristics of your PostScript device as it was manufactured. However, if you’ve changed your PostScript device—by adding fonts, memory, or other features—your PPD won’t accurately describe your device anymore. If you want to take full advantage of the features you’ve added, you’ll need to update the information about your printer. Fortunately, Adobe offers some utilities that make that easy.

If you use the Windows version of PageMaker, you can get a utility called “Update PPD”—the current version is 2.0 and it’s available on Adobe’s free BBS (call 206-623-6984 and download the “UPPPD2.ZIP” file from the section File Library:PM5:PC:UpdatePPDV2) and on Adobe’s forums on CompuServe and America Online (see pages 114-15 for information on those forums). It’s also included in the PageMaker 5.0 Enhancement Pack for Windows, available through Adobe Customer Services at (800) 628-2320 for a shipping and handling charge of $9.95.

If you use PageMaker 5.0 for the Macintosh, you can use the “Update PPD” Addition, which came with PageMaker. The most recent version of Update PPD is 1.7, and it’s available on Adobe’s free BBS (download “UPdp17.sea” from the section File Library:PM5:MAC:UpdatePPD) and on CompuServe and America Online. It’s also in the Macintosh PageMaker 5.0 Enhancement Pack (see the previous paragraph for ordering information).

Both the Windows and Macintosh “Update PPD” utilities create a custom printer file, which is a special kind of PPD file that appends or overrides the information in the original PPD file. After creating a custom printer file with one of these utilities, be sure to use it when you print—select the new file instead of your original PPD from the “Type” popup menu in the “Print document” dialog box.

If you want to learn more about PPDs and custom printer files, the following FaxYI documents can help:

  • 215120—Creating custom printer files: Comprehensive overview
  • 100101—Adding custom paper sizes to a custom printer file using a text editor
  • 100102—Updating PPD files to reflect available virtual memory using a text editor
  • 100103—Adding fonts to a custom printer file using a text editor.
micro tip

Have a PPD that’s not showing up in your “Type” pop-up menu? Perhaps the PPD file is in the wrong folder or directory. In Windows, make sure your PPD file is the ALDUS/USENGLSH/PPD4 directory (or whatever your PPD4 directory is according to the “PPD4= …” line in the [Aldus] section of your WIN.INI file). On the Mac, make sure it’s in the “Printer Descriptions” folder in your “Extensions” folder within the System Folder.

Q: My office recently installed Adobe Acrobat Pro, and now we want to be able to create PDF files from our PageMaker publications. What’s the best way? (PC/Mac)

A If you installed the “Pro” version of Adobe Acrobat, you have all four of the major components of Acrobat: the Acrobat Reader, the PDFWriter, Acrobat Exchange, and Acrobat Distiller. With these tools you have two options for creating PDF (Portable Document Format) files from PageMaker or most any application.

The easiest way is to use the PDFWriter, a special-purpose printer driver that lets you use the “Print” command to print directly to a PDF file. However, using the PDFWriter won’t always give you the best results. The PDFWriter is a non-PostScript driver, and as such won’t produce ideal results with documents from high-end layout programs, such as PageMaker, that are designed to produce their own PostScript code. If you use the PDFWriter to produce PDF files from PageMaker, you may notice color shifts in your documents, your transformed graphics may print untransformed, the screen previews of EPS files will print instead of the EPS files themselves, and your PDF files may be inconveniently large (larger than the PageMaker publication files from which they were created).

Despite these limitations, using the PDFWriter may be a good option if you want to quickly make a PDF file from a simple publication, if your PDF file will be viewed primarily on screen, or if your publication doesn’t contain EPS files. Here’s how to use the PDFWriter.

  1. Select the Acrobat PDFWriter driver. In Windows, you can set that right in PageMaker—select “Acrobat PDFWriter” from the “Print to” drop-down menu in the “Print document” dialog box. On the Macintosh, select “Acrobat PDFWriter” in the Chooser.
  2. Print your document as you normally would.
  3. Enter a name for your PDF file when the Acrobat PDFWriter prompts you to. We recommend keeping the filename to eight characters or less and adding a “.PDF” extension to the end of the filename—that ensures your PDF file will be easy to identify and open on any platform (Macintosh, Windows, DOS, or UNIX).

Another way to create a PDF file from PageMaker is to print to a PostScript file, then process that file through the Acrobat Distiller. Using this method gives you more control over how your graphics will look and print in the PDF file and, in many cases, will also give you higher-quality results (especially if your document contains EPS files). Also, if your publication contains high-resolution bitmap images that you want to downsample for on­screen viewing or relatively low resolution printing, you should use the Distiller.

To use the Distiller to create a PDF file from a PageMaker publication, follow these steps:

  1. When your publication is ready to convert to PDF, save it and select “Print…” from PageMaker’s File menu.
  2. In PageMaker’s “Print document” dialog box, make sure you’re set to print to the right device. If you’re using PageMaker for Windows, change your “Print to” printer to “Acrobat Distiller on \DISTASST.PS” (you can also select another PostScript printer driver, but if you do, you must select the “Write PostScript to file” option in step 4). If you’re working on the Macintosh, make sure you’ve selected the “LaserWriter 8.1.1” or “PSPrinter 8.1.1” (or later) driver in the Chooser.
  3. Select the Acrobat Distiller PPD from the “Type” pop-up menu in the “Print document” dialog box. If you’re using PageMaker for Windows and the “Acrobat Distiller” PPD isn’t available on this menu, you probably need to change its location on your hard disk. When you install the Distiller in Windows, it puts the Acrobat Distiller PPD (ACRODIST.PPD) in the ACRODIST\XTRAS directory. However, PageMaker won’t see it there, so make a copy of that file and put it in the ALDUS\USENGLSH\PPD4 directory.
micro tip

If you create a PDF from PageMaker using the PDFWriter and your pages end up in reverse order, print your publication to PDF again after selecting the “Reverse order” option in PageMaker’s “Print document” dialog box.

  1. Make sure your publication will print to a PostScript file. On the PC, there are two ways to do this. One way is to select the “Acrobat Distiller C:\DISTASST.PS” device from the “Print to” drop-down menu. This will make your publication print to a PostScript file called DISTASST.PS, which will be located in your root directory. If you run the Acrobat Distiller Assistant, it will automatically distill this file for you. (The Distiller Assistant is available only on the PC; for more information, see its documentation.)

The second way in Windows—and the only way on the Macintosh—that you can make PageMaker print your publication to a PostScript file is by selecting “Write PostScript to file” in the “Options” print dialog box and entering a name for your file in the adjacent text field.

  1. In the “Postscript” section of PageMaker’s “Options” print dialog box, make sure the “Normal” option (not “EPS” or “For separations”) is selected.
  2. If you’ll be distilling your PostScript file on the same computer on which you created it, or from some other computer that will have all the fonts you’ve used in your document installed, you can deselect the “Include downloadable fonts” option in PageMaker’s “Options” print dialog box. Leaving that option selected would make your PostScript file unnecessarily large—if those fonts are installed when you process the file through the Distiller, it will be able to obtain all the font information it needs from your operating system.
  3. If you’re printing a file that contains bitmap graphics, we recommend you select the “Normal” (instead of “Optimized”) graphics option.
  4. Select any other printing options you want, and press “Save” (or “Print” if you’re in Windows and did not select the “Write PostScript to file” option). PageMaker will print your document to a PostScript file.
  5. Once you’ve created your PostScript file, you’re ready to process it through the Distiller. (If you’re in Windows and you’re using the Distiller Assistant, you won’t need to perform this step—Distiller Assistant will do it for you.) Refer to the Distiller documentation for information on how to control font embedding and graphic compression.

Q: I’m getting an error that says I have exceeded the number of concurrent users permitted for this copy of PageMaker, but I know my copy is legal. What’s wrong?  (PC/Mac)

A: If you receive this error message, either too many people on your network are using a single copy of PageMaker, or you might be running into a symptom of outdated Novell NetWare drivers.

Typically the error you’re receiving occurs when more people are trying to run PageMaker than the license for that copy of PageMaker permits. PageMaker 5.0 uses Network Copy Detection (NCD) to record the number of people on the network who are using each copy of PageMaker—if that number exceeds the number permitted by the license, the user who most recently launched PageMaker will receive the error message, and will then have to close PageMaker (PageMaker lets you save your work before it closes).

micro tip

If you run into NCD errors because more users are running the same copy of PageMaker than is permitted by that license, you can use the “WIN BUMPS” utility (located in the ALDUS\USENGLSH\UTILITY directory) to increase the number of users permitted to run that copy of PageMaker. But first you’ll need to buy enough copies of PageMaker or PageMaker licenses to cover that increase, and you’ll need to get a password from Adobe Customer Service. See FaxYI document 315404, “Running PageMaker 5.0 WINBUMPS Utility…” for more information.

If your company has purchased enough copies (or licenses) for all its PageMaker users and you’re receiving this error message, it could be that the disk set used to install PageMaker on your computer was used to install PageMaker on too many other computers. (Someone in your company may have installed PageMaker from your disk set, mistakenly believing that entering a unique serial number during their installation would prevent NCD errors. However, it won’t—NCD doesn’t look at serial numbers, but at a unique network ID number embedded in each copy of PageMaker.)

To see your network ID number, select “About PageMaker…” from the Help menu (Windows) or Apple menu (Macintosh)—it’ll be the number listed below your serial number. Following it is another number that indicates how many users are licensed to run that copy of PageMaker concurrently. When you re­ceive an NCD error, make a note of that ID number and check with your colleagues to see who else has that ID and is therefore running your copy of PageMaker. If you receive NCD errors when you and your colleagues are not exceeding the number of concurrent users permitted by your PageMaker license, and you’re running the Windows version of PageMaker 5.0, your problem might be a symptom of outdated Novell NetWare VLM drivers.

Check the date of your NETWARE.DRV file in the WINDOWS\SYSTEM directory. If it’s 11/24/93 or later, you should be using VLM drivers instead of IPX and NETX drivers. When PageMaker’s NCD component queries the network for the name of the server and you’re using a version of NetWare prior to 4.02 with the 11/24/93 NETWARE.DRV driver and the version 1.1 VLM drivers, the server returns the wrong information to PageMaker, causing it to report an NCD error.

If you’re having this problem, update your NETWARE.DRV file to the version dated 9/22/94 or later and get the VLM drivers version 1.20 or later. These files can be found on Novell’s forum on CompuServe. Type GO NOVFILES and download the WINUP9.TXT and DOSUP9.TXT files, which explain what other files you must download and what you should do with them to fix your network problems. If you don’t have access to CompuServe, your local Novell reseller may be able to supply you with the files, or you can obtain them directly from Novell by calling (800) NETWARE.

Q: I have “Autoflow” turned on, but when I’m typing in PageMaker and get to the end of a column, my text doesn’t automatically flow into the next column. What’s wrong? (PC/Mac)

A Nothing’s wrong. PageMaker’s “Autoflow” feature just isn’t designed to affect text you enter manually in Page­Maker. To use the “Autoflow” feature, you must be flowing text from a loaded text icon. If you have a story in Page­Maker that you’d like to autoflow, but it isn’t in a loaded text icon, try this:

  1. Make sure “Autoflow” is selected (it should have a check next to it at the bottom of the Layout menu).
  2. Use the pointer tool to select the last text block in the story you want to autoflow.
  3. Click on your story’s bottom windowshade handle and roll it up until all your text disappears.
  4. Click on the bottom windowshade handle’s red arrow. A loaded text icon will appear.
  5. Click the loaded text icon where you want the text to begin autoflowing. PageMaker will add pages as necessary until your entire story is flowed. If you want PageMaker to stop, press the spacebar.

For more information on PageMaker’s “Autoflow” feature and how to use it, see pages 246-47 in the Aldus PageMaker 5.0 User Manual.

Q: I’ve been having printing problems ever since I installed QuickDraw GX and the LaserWriter GX driver. Aren’t they compatible with PageMaker? (Mac)

A No, QuickDraw GX and the LaserWriter GX driver aren’t entirely compatible with PageMaker. Unfortunately, in the last issue of Adobe Magazine (March/April 1995), the “So What Is GX, Anyway?” article incorrectly stated that the LaserWriter GX driver works “just fine” with PageMaker 5.0.

If you print from PageMaker using the LaserWriter GX driver, extra blank pages may print and some PICT graphics may not print at all from some publications. Also, the LaserWriter GX driver is incompatible with the current version (1.7) of the “Update PPD” Addition and utility. If you try to use Update PPD with this driver, you’ll receive the error message, “Update PPD v1.7 will not run with QuickDraw GX enabled. Please disable it to run Update PPD.” In addition, when Desktop Printing is disabled, Background Printing is enabled and the option to disable Background Printing is unavailable in the Chooser. If you remove the PrintMonitor from the System Folder, you’ll receive the error, “Nothing can be printed now, because PrintMonitor could not be found. To print, put PrintMonitor into the Extensions folder in the System Folder.”

If you encounter these problems you have a few options:

  • You can restore standard printing for all your applications by removing QuickDraw GX files, restoring Type 1 fonts, and setting up a PostScript printer.
  • You can disable the “QuickDraw GX” and “PrinterShare GX” Extensions, restore Type 1 fonts, and set up a PostScript printer.
  • You can restore standard PostScript printing for PageMaker 5.0 while retaining QuickDraw GX’s Desktop Printing for other applications.

For more information on the LaserWriter GX driver and PageMaker, or for instructions on how to restore standard Macintosh printing for some or all of your applications, see FaxYI document 215135, “Unable to Print from PageMaker 5.0 After Installing QuickDraw GX…”

By the way—the PageMaker printing problems related to the LaserWriter GX driver need not prevent you from installing System 7.5. As of early March, there is only one known, confirmed problem between PageMaker 5.0 and one of System 7.5’s components. The “Macintosh Easy Open” Control Panel, which is installed with System 7.5 by default, can interfere with some PageMaker 5.0 filters (this problem is not difficult to resolve). For more information on this problem, see FaxYI document 215604, “Error, ‘The document named [filename] was not…'”

PageMaker Tip (PC/Mac) – Sharing styles among publications

If you’ve ever designed a series of publications that need a consistent graphic identity, you probably know it’s important to use the same styles throughout those publications. That’s easy enough to do if you create all the publications from the same template (and just define all your styles in that template before you start on the individual publications). But most of us update our styles as we work, experimenting with and changing our “draft” styles. Fortunately, there are a couple of ways to share styles among publications after you’ve begun work on them.

Use the “Copy” command in the “Define styles” dialog box to copy all the styles from one publication to your active publication. Select “Define styles… ” from the Type menu and, in the “Define styles” dialog box, click on the “Copy” button. PageMaker will display the “Copy styles” dialog box, in which you can select the publication whose styles you want to copy into your active publication. Click “OK.”

If you use the “Copy” command in the “Define styles” dialog box to copy a PageMaker style into a publication that already has a style by that name, the incoming style definition will replace the definition of the existing style (you’ll receive the alert pictured at right). In addition, if some of the styles in your publication are based on a style that’s overridden by an incoming style, some of those styles’ attributes may change too, just as they would if you edited the original style on which they’re based. If you want to prevent incoming styles from overriding or affecting existing styles, name your styles differently from publication to publication.

Use the Clipboard to copy one or a few styles from one publication to another. To do so, open the publication that contains the styles you want to copy elsewhere. Select text that contains paragraphs assigned each of the styles you want and copy it to the Clipboard (select “Copy” from the Edit menu, or press Ctrl + C in Windows or Command + C on the Mac.

Open the publication into which you want to copy the styles. Select “Paste” from the Edit menu or press Ctrl + V (Windows) or Command + V (Macintosh) to paste the text and copy the styles to that publication’s Styles palette. If you use this method to copy a PageMaker style into a publication that already has a style by that name, the existing style in the active publication will not change to the incoming style’s definition—and the incoming text assigned that style will take on the attributes of your existing style definition.

The scanned article complete with images and nostalgic advertising:

Adobe Magazine May/June 1995


This post is brought to you by:
* Heron Oblivion - Heron Oblivion
* Wake Up You! The Rise and Fall of Nigerian Rock Vol. 1 (1972-1977)
* Jenny Hval - Blood Bitch

Adobe Magazine Mar/Apr 1995 PageMaker Q&A

Adobe_Magazine_March_April_1995_Cover
Adobe Magazine March/April 1995 Cover

For a few years I wrote PageMaker and Acrobat Q&A sections for Adobe Magazine. This is the March/April 1995 column.

The article is scanned into Acrobat and its OCR functionality was used to recognize the text. While OCR is a wonderful invention, the cleanup process (I pasted the content into Word and did it there) is more time consuming than expected. Note that Adobe Magazine didn’t provide bylines for Q&A articles, though the authors are listed as contributors in small print in the credits, as can be seen on the last page of the scanned PDF at the bottom of this post.

This article’s mention of Aldus Technical Support’s then-innovative use of fax machines, with its FaxYI program, to disseminate helpful information brings back memories.

Also note that, because this originally appeared in print form, a narrow column forced some scripting code to wrap when, in fact, in the code editor it shouldn’t. Therefore, we used a special symbol, 〽, to denote hitting a space and not enter, so the reader knew to keep two lines separated in print together on one line in the script. To bring attention to this, the character is highlighted. Naturally a web page can usually accommodate longer lines, but in the interest of continuity, the text below is pasted exactly as it appears in the magazine, complete with the 〽 character and the yellow highlight background color.

Q: Occasionally when I place a TIFF in PageMaker, its right side seems to get cut off a little. Why?

A: When PageMaker imports a 1-bit (black-and-white) TIFF that contains extra white area around the image, it will automatically crop the graphic for you. Unfortunately, PageMaker occasionally miscalculates where it should crop the graphic, and you end up with a TIFF image slightly clipped—usually along its right side.

Fortunately, it’s easy to correct this problem. Just select PageMaker’s cropping tool and pull the handles of the TIFF outward to uncrop it. You can also prevent this from occurring by saving your 1-bit image without any extra peripheral white space. If you want to avoid this problem altogether, you can save your 1-bit images in another format (EPS, for instance) that PageMaker will not crop during import.

Q: Sometimes I can’t get a word to hyphenate, even with a discretionary hyphen—I end up having to use a regular hyphen instead. Why does this happen?

A: This generally happens because PageMaker, using a complex system of hyphenation and justification rules, determined that a word break was not necessary at the end of your line. Discretionary hyphens only become active (turn into hyphens and make words break) under special circumstances—in other words, a discretionary hyphen isn’t a “forced” hyphen that can make a word break regardless of the word’s position. For instance, a discretionary hyphen will never make a word break if that word isn’t the last word on the line.

If you’re having trouble fig­uring out why PageMaker thinks it shouldn’t break a word that contains a discretionary hyphen, check the following:

Make sure the Hyphenation feature is turned on. If the hyphenation feature is off, discretionary hyphens won’t work. Click your text tool somewhere in the paragraph with which you’re having the problem, then select “Hyphenation… ” from the Type menu. In the “Hyphenation” dialog box, make sure the “on” option is selected.

micro tip

If you want a word to hyphenate at a certain point and it isn’t already doing so (perhaps because it’s a word PageMaker’s dictionary doesn’t recognize), don’t use a regular hyphen—if your text rewraps, that hyphen could end up in the middle of a line. Instead, use a discretionary hyphen (Ctrl + – in Windows; Command + – on a Mac). A discretionary hyphen is only visible when called into action—in other words, when the word in which it appears is at the end of a line and needs to break. At other times, the discretionary hyphen remains discreetly invisible.

Check your hyphenation zone—it might be too large. If hyphenation is turned on and you’re using left-aligned, unjustified type, the most likely cause of your problem is a hyphenation zone that’s too large. Whenever you use left-aligned type, PageMaker uses the hyphenation zone to determine whether it can break a word at the end of a line—PageMaker will wrap a word to the next line, instead of hyphenating it, if the word begins within the hyphenation zone (the hyphenation zone could have been more aptly named the “no hyphenation zone”). In this manner, the hyphenation zone setting determines how ragged the right side of unjustified type is.

If you think your hyphenation problem may be related to a hyphenation zone that’s too large, click inside that paragraph, select “Hyphenation…” from the Type menu, and decrease the “Hyphenation zone” setting until your word hyphenates and you like the amount of raggedness this creates along the right side of your unjustified lines. To achieve a consistent effect throughout your publication, build your hyphenation-zone setting into your styles.

See if your word-spacing settings need fine tuning. If you’re using justified type, PageMaker may not be hyphenating your word because it was able to justify your line by expanding or compressing your word spacing within the minimum and maximum word-space values you set in the “Spacing attributes” dialog box. Here’s why: There’s a special order to the steps PageMaker takes when it tries to justify a line. First, it tries to compress your word spacing to as much as the minimum value you set in the “Spacing attributes” dialog box. Next, it tries to expand your word spacing up to the maximum word-spacing value. Only if these steps don’t allow it to justify the line will PageMaker try to hyphenate your word.

If this happens to you, you should try giving PageMaker a little less leeway to compress and expand your word spacing. By default, PageMaker’s word-spacing minimum value is 50% and its maximum word-spacing value is 200%. Many professional typographers recommend less extreme minimum and maximum values for more consistent-looking, readable type. Try setting your minimum value to approximately 80% and your maximum value to around 130%.

Check your “Limit consecutive hyphens to” setting. If you’re still having problems, check to see if the line immediately preceding the line with which you’re having a problem ends in a hyphen. If so, PageMaker may not be hyphenating the next line because of a low “Limit consecutive hyphens to” setting.

Open the “Hyphenation” dialog box and take a look at the “Limit consecutive hyphens to” setting—if it’s set at “1,” or “2,” or any other number, PageMaker won’t hyphenate any more than that number of consecutive lines. Increase the setting for more hyphenation or, if you want to disable this feature altogether, enter “No limit” for unlimited consecutive hyphens (this is PageMaker’s default setting). Doing so might be a good idea for very narrow columns, which tend to have awkward breaks if not adequately hyphenated, but may not be the best choice in other situations—two or more consecutive lines ending in hyphens can be visually disruptive. Be sure to proofread your copy carefully if you use the “No limit” setting.

micro tip

You can also use discretionary hyphens to prevent specific words from hyphenating. To do so, place the discretionary hyphen (Ctrl + – in Windows, Command + – on the Mac) immediately before the word’s first character.

Make sure that word hasn’t been set not to break. If you’ve tried everything else and your word still won’t hyphenate, it could be that you inadvertently did something to prevent it from breaking. Highlight the word and select “Type specs…” from the Type menu. In the “Type specifications” dialog box, make sure the “No break” option isn’t turned on—if it’s on, select the “Break” option instead to allow your word to break.

If the “No break” option wasn’t selected, another possibility is that you entered a discretionary hyphen right before the first character in your word—this will also prevent your word from hyphenating. To make sure there isn’t a discretionary hyphen there (it won’t be visible) click just to the right of the first character in your word, and press the left arrow once—this should place you between the word and the discretionary hyphen, if there is one there. Then press the backspace key one or more times, until you erase the space before the word, and retype the space.

For more information on PageMaker’s hyphenation feature, see Adobe’s Straight Talk paper titled, “Hyphenation and Justification in PageMaker 5.0.” It’s available as document #500307 on the Adobe FaxYI system, (206) 628-5737.

Q: I looked in the PageMaker manual for information on one of the Additions and had a difficult time finding anything about it. Where can I find this Information?

A: The Additions have their own manual, Aldus Additions for Page­Maker 5.0, that shipped with PageMaker. This manual covers the Additions that came with the program—for instance, “Display pub info,” “Drop cap,” PS Group it,” and others. One exception is the “Update PPD” Addition, which is covered not in the Aldus Additions manual, but in PageMaker’s online help.

Information on any Addition that did not ship with PageMaker should come with that Addition. Some of these Additions, including the “TrapMaker” Addition (Macintosh only) and “lnfoPublisher” (Windows only), are available from Adobe. Information on these Additions is available on the Adobe FaxYI system—dial (206) 628-5737 and follow the recorded instructions.

Most of the Additions available for the Macintosh and Windows versions of PageMaker 5.0 are created and marketed by independent developers. Many of these Additions, and information about them, are available from the Plug-In Connection, which can be reached at (800) 685-3547. Additions available through the Plug-In Connection include Azalea “POSTNET,” which allows you to create bar codes in PageMaker; Integrated Software lnc.’s “AA Shadow” Addition, which lets you create a drop-shadow effect for any object on a PageMaker page; and Zephyr Design’s “Zephyr Grids,” which provides an easy way to create a grid system.

Q: Is there a way to replace or remove a color that has been applied to multiple objects?

A: Yes. You can either remove the color altogether—and have PageMaker assign black to the objects that had been assigned that color—or replace it with another existing color. To remove a color, select “Define colors…” from the Element menu. In the “Define colors” dialog box, select the color you want to remove and click the “Remove” button. If that color is assigned to any objects, PageMaker will display a dialog box that gives you the option to change those objects to black or to cancel the color removal.

If you want to change one color (let’s call it “Color1″) to another color (which we’ll call “Color2”), so that any objects assigned Color1 become Color2, follow these steps:

  1. In the “Define colors” dialog box, select the color you want to replace (Color1) and click the “Edit…” button.
  2. In the “Edit color” dialog box, change the name of Color1 to that of Color2. Be sure to spell it exactly the way the replacement color is spelled: use the same spacing, capitalization, and hyphenation. Otherwise, you’ll simply change the name of your first color.
  3. Click “OK.” PageMaker will display a dialog box that says, “Change all Color1 items to Color2?” If you click “OK,” PageMaker will return to the “Edit color” dialog box, where you can click “OK” again to complete the process. All the items that had been assigned your Color1 color will now be assigned the Color2 color, and your Color1 color will no longer appear on the Colors palette.

Note that you cannot remove or replace a color imported with an EPS file that you still have in your publication. Such colors are preceded by a “PS” icon on the Colors palette. You can, nevertheless, replace a non-EPS color with an EPS color.

Q: When I use the “Display pub info” Addition to see what fonts are in my publication, it often lists fonts I’m sure I didn’t use. Where are these fonts coming from?

A: The “Display pub info” Addition not only lists the fonts you actually use in your publication, but also those listed in your publication’s styles (including ones you didn’t use), your publication’s defaults, and the font the Story Editor uses to display text. That’s because the Addition works by listing all the fonts currently installed on your system and checking which ones are required for your publication.

Here’s how you can check your publication to find out where your “mystery” fonts are. First, select “Preferences…” from the File menu, and click “Other…” in the “Preferences” dialog box—that will open the “Other preferences” dialog box, which lists what font the Story Editor uses to display text. If this is a font you’re not using elsewhere in your publication, and you don’t want “Display pub info” to list it, change your Story Editor font to something you do use elsewhere in your publication.

Next, check your styles. Select “Define styles…” from the Type menu, and in the “Define styles” dialog box scroll through your list of styles, clicking on each one as you go, and make a note of what font it uses—this information will be displayed beneath the style list. It’s a good idea to remove styles you don’t need—especially if they list fonts you aren’t using elsewhere in your publication. Doing so will help reduce the size and complexity of your publication file, as well as prevent the “Display pub info” Addition from listing these fonts.

Finally, you can find out what your default font is by making sure no text is selected (an easy way to do this is by switching to the pointer tool) and selecting “Font…” from the Type menu. Whatever font is selected is your default font. If that’s a font you aren’t using in your publication, change it to something else.

After you’ve completed these steps, save your publication by selecting “Save as…” from the File menu, then run the “Display pub info” Addition again. If it still lists fonts you think you didn’t use, try opening your publication again and using the Story Editor’s Find feature to figure out where the fonts are in your publication—sometimes such fonts are assigned to single characters or are applied to overset text or text on the pasteboard.

If you use the Macintosh version of PageMaker 5.0, you can also use Aldus CheckList to find out what fonts you’ve used in your publication. Aldus CheckList is a stand-alone application that can analyze a PageMaker or PostScript file and list a variety of information about it. For instance, CheckList can tell you what fonts have been used in a publication, the pages on which each font appears, and whether the font is used in a PageMaker story, a PICT, or an EPS. CheckList also provides information on a publication’s styles, links, and print settings. It’s available directly from Adobe Customer Services at (800) 628-2320.

Q :The last Issue of the magazine had a tip on making non printing text. Is there a way to make graphic elements nonprinting?

A Yes—you can use PageMaker’s Scripting feature to make graphics as well as text blocks nonprinting. Nonprinting elements are handy to use as notes or visual signals to colleagues or service providers, or as guides to help you lay out your publication.

The following scripts take advantage of the scripting language’s “suppressprint” command. This command allows you to determine whether a PageMaker object prints or not. For more information on the “suppressprint” and other scripting commands, see the Aldus PageMaker 5.0 Script Language Guide, available from Adobe Customer Services at (800) 628-2320. If you’re not familiar with scripting or any type of macro language, don’t worry—all you need for these steps is a little curiosity and some typing skills.

Script 1: Turns a text block into a nonprinting element

To create the following script, open the Story Editor and select “New story” from the Story menu, then type the following text exactly as it appears below. Do not use any tabs. In addition, do not use typographer’s quotes (you may need to temporarily turn off the “Use typographer’s quotation marks” option in the “Preferences” dialog box). The following code contains the symbol “”—when you see this symbol, do not press the Return or Enter key to start a new line. Just press the spacebar once.

definecolor "non-repro blue, 
0, 0, 1, 40, 100, 100
printink "non-repro blue", 0, "",""
suppressprint 1
textedit
textselect +textblock
color "non-repro blue"

Next, select “Export” from the File menu, and select “Text-only” from the Format pop-up menu. Enter a name for your script—whatever name you choose will be what appears in the “Run script” dialog box, so use something easy to remember, like “off_text” (if you use PageMaker for Windows, your script name must be eight characters or less) or “nonprinting text block.” Then, save your script in the SCRIPTS folder or directory—in Windows, it’s a subdirectory of your PMS directory; on the Mac, that folder is located within your “Aldus PageMaker 5.0” folder.

To use your script, select a text block with the pointer tool (if you select text with the text tool, the script won’t work). Then, choose “Run script…” from the Additions submenu of the Utilities menu. In the “Run script” dialog box, select the script you named, and click “OK.”

The script will do the following: First, it defines a color called “non-repro blue” and sets that color to be nonprinting (in other words, unchecks that ink in the ink list of the “Separations” section of the “Colors” print dialog box, so you won’t get a “non-repro blue” plate if you print separations). Next, using the “suppressprint” command, it changes the entire text block into a nonprinting element. Then the script will select all the text in the text block and set its color to non-repro blue. Although the non-repro blue color doesn’t cause the text to be nonprinting, it will help flag the text as a non-printing element.

Script 2: Turns a text block back into a printing item

To create this script, follow the directions in Script 1 to turn the following text into a script-name it something like “on_text” or “printing text block.”

suppressprint 0
textedit
textselect +textblock
color "Black"

To use this script, select the pointer tool and click on a text block that’s currently defined as a nonprinting element. Select “Run script…” from the Additions submenu of the Utilities menu, select your new script from the “Run script” dialog box, and click “OK.” The script will change your text block back into a printing element and assign its color to black. (If you want your text to be some other color, you’ll need to change it manually.)

Script 3: Turns graphic elements into nonprinting Items

The following script turns graphic elements (PageMaker­drawn lines, boxes, and ovals, as well as imported graphics) into nonprinting elements. When you see the “” symbol, do not press the Return or Enter key to start a new line—just press the spacebar once.

definecolor "non-repro blue", 
0, 0, 1, 40, 100, 100
printink "non-repro blue", 0, "", ""
suppressprint 1
color "non-repro blue"

Before running the script, use the pointer tool to select the graphic elements you want to make nonprinting. The script turns the object or objects you had selected into non­printing elements and applies the “non-repro blue” color to them. (lf you run this script on an imported color graphic, it won’t change the object’s on-screen colors.)

Script 4: Tums graphic elements into printing Items
suppressprint 0
color "Black"

This script will turn off the “suppressprint” command for the selected objects and assign them the color Black. If you want your object to be some other color, you’ll need to change it manually. If your object is an imported color graphic that should not be assigned any color, select it and choose “Restore original color” from the Element menu.

PageMaker Tip (PC/Mac) – Guides be gone

It’s easy to get carried away with PageMaker’s ruler guides during the design process—sometimes, before you know it, your screen is a maze of cyan lines obscuring your layout. Here are a few ways to eliminate this visual clutter:

  • If you want to hide your ruler, column, and margin guides temporarily, press Ctrl + J (Windows) or Command + J (Macintosh). This keyboard shortcut deselects “Guides” from the “Guides and rulers” submenu of the Layout menu. (And, on a related note, pressing Ctrl + J or Command + J twice very quickly is a great way to force PageMaker to redraw your screen without zooming into a different portion of your page.)
  • If you want to restore your ruler, column, and margin guides to the positions you defined on your master page, select “Copy master guides” from the Layout menu. (If this item is grayed out, deselect the “Lock guides” option on the “Guides and rulers” submenu of the Layout menu.)
  • If you want to get rid of all your ruler guides, not just copy the ones from your master pages (especially if your master pages are where all the clutter is), hold down the Shift key while selecting “Guides” from the “Guides and rulers” submenu of the Layout menu—this will erase all the ruler guides from the current page. If this has no effect. make sure you deselect the “Lock guides” option from the same menu before trying it again.

PageMaker Tip (PC/Mac) – Send in the clones

Many drawing applications offer a “cloning” feature—a way to paste a copy of an object directly onto its original. There’s no “Clone” command in PageMaker’s menus, but you can get the same effect anyway. To clone an object in PageMaker, select it with the pointer tool, and press Ctrl + C (Windows) or Command + C (Mac) to copy it to the clipboard. Then press Ctrl + Shift + P (Windows) or Command + Option + V (Mac) to paste a copy of the object onto the original. One handy use of this is to get two identical objects lined up horizontally—clone the first one, then Shift-drag the clone (which keeps its motion horizontal).

The scanned article complete with images and fun outdated advertising:

Mark Iverson Adobe Magazine March/April 1995


This post is brought to you by:
* Roxy Music - Country Life
* Roxy Music - Stranded
* Brian Eno - Here Come the Warm Jets

Adobe Magazine Jan/Feb 1995 PageMaker Q&A

adobe_magazine_jan_feb_1995_cover
Adobe Magazine Jan/Feb 1995 cover

For a few years I wrote PageMaker and Acrobat Q&A sections for Adobe Magazine. This is the January/February 1995 column.

The article is scanned into Acrobat and its OCR functionality was used to recognize the text. While OCR is a wonderful invention, the cleanup process (I pasted the content into Word and did it there) is more time consuming than expected. Note that Adobe Magazine didn’t provide bylines for Q&A articles, though the authors are listed as contributors in small print in the credits, as can be seen on the last page of the scanned PDF at the bottom of this post.

Q: There are bunch of files with .PMG extensions In my publication folder . What are they? (PC/Mac)

A: Those PMG files are what the “PS Group it” Addition creates when you group elements in PageMaker. To group objects, “PS Group it” creates an EPS graphic of the selected elements, and saves it with the file extension .PMG in the same directory or folder as the publication. Then it imports the graphic exactly where the objects were originally.

As long as the grouped object or any copies of it are present in your publication, it’s a good idea not to delete or move the PMG file, since PageMaker needs it both to ungroup the object(s) and to print at high resolution to a PostScript device. Here’s why.

A PMG file is an EPS graphic that contains both a low resolution, bitmap version of the image for display on screen (the screen image is also used for printing to non-PostScript devices) and the PostScript information needed to print at high resolution to a PostScript printer. When “PS Group it” creates the PMG file, PageMaker always imports the PMG file with the “Store inside publication” link option turned off, so only the low-resolution screen image is stored inside the publication.

Therefore, when you print “PS Group it” objects, PageMaker must have access to the external, linked PMG file to be able to download the high-resolution graphic data to a PostScript printer. If you delete, move, or rename the PMG file, PageMaker won’t be able to do this and will print only the low-resolution, bitmap screen image. You can change this on a file-by-file basis through the “Links” dialog box (choose “Links…” from the File menu, select the file, click “Options…,” and check “Store copy in publication”).

Another reason you shouldn’t delete PMG files is that they contain information “PS Ungroup it” needs to ungroup your object. This means that if you delete a PMG file for a grouped object, you won’t be able to ungroup the object or any copies of it. When you do ungroup a grouped object, you can choose to have “PS Ungroup it” automatically delete the PMG file. Remember—if you decide to do this, you won’t be able to ungroup any copies of the grouped object that you may have made.

The “PS Ungroup it” dialog box also asks if you want to always delete PMG files when ungrouping, and includes the option of never displaying the “PS Ungroup it” dialog box again. If you select this option and later decide you want to view the dialog box while ungrouping, quit PageMaker and then delete the preference file that contains this setting. On the PC, delete the UNGROUP.PRF file in the ALDUS\USENGLSH\ADDITIONS directory; on the Mac, delete the “PS Group it preferences” file, located in the System:Aldus:Additions folder.

Q: Sometimes when I change the font in a publication, it reverts to a different font when I begin a new text block. How do you make sure the font is permanently changed for the publication? (PC/Mac)

A: If you want all new text blocks in your publication to use a particular font, what you’re after is a new default font: make sure you have no text selected (a good way is to click on a tool in the toolbox) and select the font you want.In fact, to change any default—text or other settings—make sure you have nothing selected and then change your settings. The new default will affect any new stories you create, new objects you draw, or new graphics you import.

The only exception to this rule is with color. You can have three default color settings—a default color for text, a default color for lines, and a default color for fills (which also functions as the default color for 1-bit and grayscale bitmap graphics). To set a default text color, click on the text tool and select a color from the Colors palette.

To set a default color for both lines and fills, make sure no objects are selected, click on any tool other than the text tool, make sure “Both” is selected in the Colors palette dropdown menu, and select a color from the palette. If you want to have different default colors for fills and lines, the easiest way to set them is to make sure no objects are· selected, choose “Fill and line…” from the Element menu, and select your new default colors in the “Fill and line” dialog box.

You can also set application-wide defaults, which will affect all new publications you create thereafter. To do so, close all your publications and then change any settings that aren’t grayed out. PageMaker stores these application-wide defaults in a configuration file (PMS.CNF, located in the ALDUS\USENGLSH directory in Windows, or the “PM5.0 Defaults” file located in the Preferences folder within the System Folder on the Macintosh). If you ever want to restore PageMaker’s original application-wide defaults. quit PageMaker and delete or rename its configuration file—it will automatically generate a new one the next time you relaunch PageMaker and create or open a publication.

Q: Sometimes I check my “Links” dialog box and see unusual characters in front of my linked document or letters for page numbers. What does this stuff mean? (PC/Mac)

A: The symbols that appear to the left- of your linked objects convey special information about the status of your links—they appear any time PageMaker detects that one of your linked objects may not be up to date. The characters that appear in the “Page” column to the right of your linked objects describe the objects’ page numbers or other positions.

If you’re ever unsure what one of the link-status symbols means, just click on the linked object displayed with the symbol and PageMaker will list an explanation of that object’s link status in the “links” dialog box under “status.”

Link-status symbols

NA — Indicates the object is not linked to an external document because the object was pasted without links or is an OLE-embedded object.

? — Indicates that PageMaker can no longer find the linked object’s external file—usually because that file was renamed, deleted, or moved. Unless your external file has been deleted, you can re-establish the link by clicking on the “Info…” button, locating the external file, and clicking “Link.”

+ (PC) or (Mac) — Indicates that the object is linked to an external file that has been modified since the link was first established or last updated. Also indicates that you have set that object to update automatically. Therefore, PageMaker will update the object the next time you print or reopen your publication. If you want to update your object sooner, select it and click the “Update” or “Update all” button in the “Links” dialog box. Note: In Windows, the “+” also indicates that the object is stored inside the publication.

X (PC only) — This is identical to the “+” symbol, except it indicates the object is not stored inside the publication.

(PC) or ◊ (Mac) — Similar to the “♦” or “+” symbol—indicates that the object is linked to an external file that has been modified since the object was imported or last updated. However, unlike the “♦” or “+” symbols, the “◊” or “-“ symbols indicate that you have not set the object to update automatically. To update the object, select it and click on “Update” or “Update all.”

! (PC) or △ (Mac) — Indicates that the object is linked to an external file and that both the internal and external copies of the object have been modified. If you click on “Update,” PageMaker will replace the internal copy of the object with the external copy.

>— Indicates the link was established on another platform (Macintosh or Windows), and the object’s format isn’t completely supported on your current platform (for example, if you chose not to convert metfiles to PICTs, or vice versa, when you opened the publication).

¿—(Unlike the other link-status symbols, this symbol appears in the far-right column of the “Links” dialog box.) Indicates the object will not print in high resolution or may not print as expected—for example, because a linked file is missing, a required filter is not available, or the linked file has been modified since it was placed or last updated.

Page/location symbols

UN—Object is an inline graphic or text in a story that has not been placed in layout view yet (is part of an unflowed, uncomposed story in the Story Editor).

LM—Object is located on the left master page.

RM—Object is on the right master page.

PB—Object is located on the pasteboard.

OV—Object is an inline graphic located in overset text—text that is not displayed in layout view because it has not been completely flowed.

Q: I’ve noticed that my bitmap graphics tend to appear very choppy in PageMaker, even with a high-resolution video card installed. Is there anything I can do to make them appear crisper? (PC/Mac)

A: Yes. In fact, PageMaker has several features that let you control how smooth your bitmap graphics look on screen—you should just be aware that the smoother your bitmap graphics appear, the longer they’ll take to redraw.

Before we list all your options, here’s a brief overview of how PageMaker handles bitmap graphic display. PageMaker gives you three display choices for your bitmap graphics. These options, which are located in the “Preferences” dialog box, are “Gray out,” “Normal” (the default), and “High resolution.”

If you choose “Gray out,” your screen will redraw at the greatest speed possible, but all your graphics (including vector-based ones) will display as gray boxes. In addition, some grayed-out graphics may not print to non-PostScript devices. If you select “High resolution,” PageMaker displays your graphics at the highest resolution possible, using all the data in the graphic files. The trade-off you make is performance—when you use the “High resolution” option, your screen redraw will be slower.

The “Normal” option offers a middle ground between the other two options. When the “Normal” option is selected, PageMaker displays your bitmap graphics using their low-resolution screen images. With the “Normal” setting, your bitmap graphics will redraw pretty quickly but won ‘t look very crisp. Just how chunky they look will depend on the resolution of the screen image PageMaker created when you imported the graphic, and that depends on the “Maximum size of internal graphic” setting in the “Other preferences” dialog box. By default, this option is set at 64K, and you can change it to anything between 8K and 1024K. The smaller you make this setting, the chunkier your screen images will look in “Normal” graphics mode, and the faster they’ll redraw. If you alter this setting, the change will only affect graphics you import or update thereafter.

If you have one or a few bitmap graphics that are displaying very poorly in “High resolution” or “Normal” mode (or printing that way), the first thing you should do is check to make sure their links haven’t been broken , especially if those graphics aren’t stored within your publication. Select “Links…” from the File menu, and in the “Links” dialog box find the name of your graphic . If the link is not up to date or PageMaker cannot locate the graphic’s external file, it will display a special symbol next to that item in the list (see the previous question for an explanation of those symbols) and you’ll need to reestablish or update that link.

If your links are up to date and your bitmap graphics still look chunky on screen (but print fine), you have several options:

  • If you want all your graphics to display at high resolution, use the “High resolution” graphic-display option.
micro tip

By holding down the Control + Shift keys (Windows) or the Control key (Macintosh) while redrawing your page, you can view graphics in high resolution when “Normal” is selected in the “Preferences” dialog box.

  • If the “Normal” setting works for you most of the time, but you want your graphics to display in high resolution occasionally, you can force them to do so using a special keyboard shortcut—just hold down the Control+ Shift keys (Windows) or the Control key (Macintosh) while redrawing your page. You can redraw your page by selecting an option from the View submenu of the Layout menu, by double-clicking on your publication window’s title bar (Windows), or by clicking on the resize box in the upper-right corner of your publication window (Macintosh).
  • If you like using the “Normal” setting but want your graphics to display at slightly higher resolution, you can increase the “Maximum size of internal graphic” setting and reimport your graphics.

Q: Sometimes when I place a graphic, I get the message: “The document named ‘[filename]’ was not created with the application program ‘PageMaker.’ To open the document, select an alternate program with or without translation.” What’s going on? (Mac)

A: You probably have the “Macintosh Easy Open” System Extension installed, and it’s interfering with PageMaker’s import process. Macintosh Easy Open comes with System 7.5. In addition, some applications such as DataVis MacLink Plus and Aldus Fetch 1.2 automatically put the Extension in your System when they are installed.

Macintosh Easy Open is a software Extension that allows a document to be opened when the application that created it is not available. Macintosh Easy Open also allows documents to be converted into another application’s format without actually opening the document.

Unfortunately, Macintosh Easy Open sometimes interferes with PageMaker’s import process. If you see this error message while importing, open the Macintosh Easy Open Setup Control Panel (called just Macintosh Easy Open in System 7.5) and either turn off the utility or deselect the “Always show choices” and “Include choices from servers” options (these options are called “Always show dialog box” and “Include applications on servers” in System 7.5).

Q: I’ve noticed that you can use either SuperATM, PANOSE, or both to work with missing fonts. ls there a way to determine which is best for me? (Mac)

A: Yes. Anytime you’re missing a font, the best thing to do is install the font—that’s the only way to ensure that your fonts look the same, retain the same line endings and page breaks, and print the way you intended them to. Sometimes, however, reinstalling a missing font isn’t possible or practical. In these cases, use SuperATM to generate a substitute if your font is just missing temporarily. If you need to find a permanent substitution for a missing font, use PANOSE. Here’s why.

SuperATM is a special version of Adobe Type Manager that can automatically create a simulated version of a missing font. When it detects a font is missing, it generates a substitute by taking a multiple-master typeface and shaping it according to the missing font’s metrics (the exact character-spacing values), which must be available in the “ATM Font Database” file in your System Folder.

Using SuperATM-generated substitute fonts works extremely well when you need to use a different Macintosh temporarily to work on your publication or when you’re temporarily missing a font or fonts. That’s because SuperATM’s substitute fonts reproduce the exact character-spacing values of your missing fonts, allowing you to retain line endings and page breaks. If you frequently move your publication around the office or proof-print from more than one Macintosh, then SuperATM is probably the best font-matching system for you. Just remember that Super ATM-generated fonts are supposed to be temporary substitutes-they won’t look exactly like your original fonts, so you shouldn’t use them for final output

If you would like PageMaker to use SuperATM, you must make sure it has been installed successfully and that the “Substitute for missing Fonts” option is selected in its Control Panel.

Unlike SuperATM, PANOSE does not generate substitutes for your missing fonts. Instead, it finds or lets you specify the next-best match among your installed fonts. Because PANOSE substitutions are other fonts that may not have the same (or even similar) character-spacing values as your missing fonts, PANOSE substitutions will often cause line endings and page breaks to change.

PANOSE is most useful when you are missing a font that you will not be able to install before you produce final output. It’s also valuable when you want to be notified whenever you have a missing font—just make sure the “Show mapping results” option in the “Font matching” dialog box is selected so the “PANOSE font matching results” dialog box appears whenever PageMaker detects a missing font.

For more information on using SuperATM and PANOSE in PageMaker 5.0, see FaxYI document number 215405, “TechNote: Using font mapping in Aldus PageMaker.” FaxYI is at (206) 628-5737.

PageMaker Tip – Different colors for margins, columns, and ruler guides (PC)

By default, PageMaker’s ruler guides are cyan, column guides are light blue, margin guides are pink. and the “floor” (the area that surrounds the pasteboard) is light yellow. Sometimes these colors aren’t very practical—for instance, if you’re working with a lot of blue objects, you might not be able to see your column and ruler guides easily. By editing the ALDUS.INI file, you can customize the colors of these elements.

To do so, make a backup copy of your ALDUS.INI file, which is located in the ALDUS\USENGLSH directory, then open it in a text editor such as the Windows Notepad. The colors of these elements are specified as combinations of red, green, and blue components, each of which is defined numerically as a value from 0 to 255. When you open your ALDUS.INI file, you can enter the following lines in the [PageMaker 5] section:

ColumnGuideRGB=128 128 255

RulerGuideRGB=0 255 255

MarginGuideRGB=255 128 255

FloorRGB=255 255 128

The numbers above are the default settings. The first number in each line is the red setting, the second is the green setting. and the third is for blue. You can experiment with different number combinations to turn your guides and the floor different colors. For example, a setting of 192 0 192 equals purple, a setting of 192 192 192 is light gray, and a setting of 255 128 128 is pinkish orange. Restart PageMaker for your changes to take effect

Please note that some light colors may not display on a black-and-white screen. Also, changing these settings in your ALDUS.INI file may not affect display color with certain highresolution video cards, some of which display the guides as black regardless of what the ALDUS.INI settings are.

PageMaker Tip – Creating nonprinting notes (PC/Mac)

Ever wish you could create a nonprinting note or comment in PageMaker? While there isn’t a specific feature for this, you can create this effect in other ways. Here are two methods.

First, if your publication will be printed in a single color or your final output will be to color separations, create a special spot color for your notes. (Call it something like “nonprint notes.”) Then, when you’re ready to print your publication, select “Separations” in the “Color” print dialog box and select only the colors you do want to print. If a service bureau will be creating final output for you, make sure you let them know you’ve done this—otherwise, they might print separations for your notes, or worse, convert your notes color to a process color and print them that way.

If that method isn’t practical—for instance, if you’ll be printing final output or critical proofs to a composite color device—try this instead. Create a special style for your notes and assign it to any text you don’t want to print during final output or certain proofs. Then, when you want to print everything in your document except the notes, edit your style so that the color of the text becomes “Paper.” Just make sure none of the text is placed over colored backgrounds Also, be sure to use a font that will be resident in your final output and proofing device, or that you’re using elsewhere on the same page—that will ensure PageMaker doesn’t end up downloading a font for your paper-colored text.

The scanned article complete with images and fun outdated advertising:

Adobe Magazine PageMaker Q&A - Jan/Feb 1995


This post is brought to you by:
* Jessamine - The Long Arm of Coincidence
* Thurston Moore - Rock N Roll Consciousness

Adobe Magazine Q&A columns

aldus_adobe_magazines
Aldus and Adobe Magazines

Back in the 1990’s when working in Technical Support for Adobe I volunteered to write the Question and Answer section for PageMaker in Adobe magazine. Gen X oldsters may recall that Adobe acquired Aldus around November of 1994, which corresponds with Aldus Magazine’s transition to Adobe Magazine. My first few columns were about PageMaker, which I supported at the time. Shortly after the acquisition I was tapped on the shoulder to support Acrobat on the phones and write about Acrobat, which was version 1.0 at the time, in the magazine. I recall Adobe going all-in on Acrobat to create a standard file format for distributing documents of all types, similarly to how they created a high-end printing standard using the PostScript printing computer language. Looking back and remembering how new the product was at the time, it’s impressive to see how well they succeeded.

Each column I wrote will be posted on this blog as fast as I can scan them and harvest their content using Acrobat’s OCR functionality. Even if the topics are far outdated, my hope is they serve as good samples of my tech writing. They also are mini time capsules of technology at the dawn of the internet explosion. These are from pre-Amazon and pre-Google days, and I find some of the advertising striking the same way the advertising in old Life magazines in my grandparents’ basement appealed to me as a kid. Along with the text, each post will also contain the scanned PDF to display the old ads and images that went with the articles.

PageMaker Q&A columns:

Acrobat Q&A columns:

This post is brought to you by:
* Spiritualized - Let it Come Down

Best Music of 2016

Better late than never, here’s my Best of 2016 music list. I’m sure there are forgotten records that will pop into my head tomorrow, so it shouldn’t be considered complete.

Records

– Nocturnal Koreans by Wire – Like the Swans, Wire are an old band who never really put out a horrible record and are on a streak of fantastic creative output. This one feels more like a Colin Newman solo record with less influence from Graham Lewis than usual, which is just fine. Colin Newman’s 2016 solo reissues are also worth seeking out if you’re not familiar.

The Glowing Man by The Swans. The Swans are full-on emotional drain and on a streak of greatness. Their last few are stellar, and this one doesn’t disappoint. Oddly this album also was my most frequent musical running companion while training for this year’s Seattle half-marathon.
https://www.youtube.com/watch?v=jFHQiYvuVlM

– The Paul Bowles field recordings from Morocco. Handsomely packaged in a gilded box that opens to reveal a leather-bound book embossed with gorgeous Middle Eastern patterns. This is another top-notch release from the Dust To Digital. In the same order and from the same label I purchased Folksongs of Another America – Field Recordings from the Upper Midwest, 1937-1946, both from Forced Exposure (give them your business because they deserve it). Folksongs… comes in a thick hardbound book that discusses all the tunes, many sung in old-world languages. The culture revealed here is thankfully preserved since it’s being squeezed to oblivion by contemporary culture. This would also be a top one for 2016, but alas it came out last year.

– Blackstar by Bowie. RIP my space friend. He went out with a heartbreakingly beautiful farewell. His passing prompted me to revisit his 1990’s output, and, well, you can’t polish turds, but man, this and The Next Day prove he always had it in him. Someone needs to do some investigation and write a thesis explaining why his output stunk it up after Tonight (many say after Let’s Dance, but I think Tonight is good stuff).

Everything is Nothing by Jah Wobble. This guy is the most prolific artist I follow and buy without question. Everything is Nothing doesn’t disappoint. It’s bass-driven jazz and groove that lifts my spirits. Gorgeous female voices, trumpet, and the fantastic drummer Marc Layton-Bennett who’s played on about 10 of Wobble’s recent releases make this one of his best in the past few years.

Day of Light by Constantine – technically released in Dec 2015. Aching and haunting acid folk from Chicago psych outfit.

– Kandodo / McBain – Lost Chants / Lost Chance. Kandodo here is the majority of Bristol psych-rock band, The Heads. Kandodo started as a solo venture of their singer and guitarist, Simon Price. His first release is pretty good, not great, but a nice change from the pummeling of his previous band. Here he’s joined by two other members of The Heads and John McBain of Monster Magnet, who I really don’t know much about. This record features long tracks exploring slow riffs. To quote the Midheaven site, it’s “a meeting of like minds surfing the sonic highways to tonal oblivion.” Great stuff, and on vinyl it comes on two records, one at 45 and on at 33, to keep things interesting.

– There Was a Time by Bari Watts. I don’t know this guy’s story. He’s a middle-aged fellow from England who’s associated with the Bevis Frond, and based on that latter association I checked him out. This guy channels Marc Bolan like no one ever has, and the record is the long lost T Rex record that was never recorded. Mr. Watts doesn’t get a lot of points for originality, but he makes up for that in spades with his spirited tribute to his hero.

Heron Oblivion by Heron Oblivion. Perhaps a super group, perhaps not. Some Comets on Fire guys joined by someone else and by the singer from the beautiful Espers result in a full on psych-fest. Quiet acid-folky parts are quickly swallowed by a swirl of guitars dancing around each other in borderline cacophony held together by perfect tension.

Plays Music for Airports by Psychic Temple. Who would consider covering Brian Eno’s Music for Airports? Chris Schlarb, that’s who, aka Psychic Temple. Here he assembles an 11-musician ensemble to belt it out his interpretation, and it works. The most well known of the 11 is Mike Watt. This is a music lover’s reward: following a prolific artist you respect who appears on an obscure artist’s record, such as Watt does here, leading you to other little known gems such as this. Sometimes it’s wasted money, other times it’s a gift. Thank you Mike Watt, not so much for your playing, which is good here though a bit drowned in the mix, but for joining small artists knowing that your name will likely lead many Minutemen and fIREHOSE fans to well done ambient jazz.

Live

Jah Wobble at the Crocodile. He reinterpreted several PiL songs, revelled in his love of reggae, jazzed it up, reprised his world music phase from the 1990’s, and mesmerized with his bass playing.

Sick Man of Europe at the Sunset for Christopher Swenson birthday. Thank you Mr. Swenson for having a birthday and making this happen. Cheap Trick never sounded so good.

Lists

The Quietus

Graham Duff, though after following his past few best-of lists one can rest assured that if Wire, Nick Cave, or the Fall put out a record that year, it will make his list. His penchant for bands fronted by female singers is welcome, as well as the shoegazers and experimental releases. I’ve discovered many great artists through his lists.

Mikey IQ Jones reissues list in FACT magazine.

Reissues

– The recent limited Redd Kross recordings, especially the Hot Issue. While Steven McDonald is busy doing his bass pushups to keep up with bassing in not one, not two, but three amazing bands, Melvins, OFF!, and Redd Kross, his brother, the creative Redd Kross genius, is putting out hyper-limited releases of unreleased tracks under the “Hot Issue” moniker. One is studio outtakes, though it’s unusual that the best track from Steven McDonald’s solo record, a fantastic power-pop cover of Kim Fowley’s Motorboat, appears here under the Redd Kross moniker. Still, it’s a great addition. The other Hot Issue is a pretty good live recording from Vancouver BC on the Show World tour, and Show World happens to be their most overlooked and consistent record. Great stuff. They also reissued Teen Babes from Monsanto and say it’s the first time it’s been available on CD. However, they seem to have forgotten the Trance Australian Tour 1992 release that contains all of Teen Babes, plus some early versions of songs that ended up on Phaseshifter.
http://reddkross.com/hot-issue-redd-kross-ltd-ed-12-availa…/

– PiL’s Second Edition on vinyl in a tin square box. Unfortunately it’s several hundred dollars, so I simply tease myself by going to the buy page, stare for awhile, then click elsewhere. It’s a seminal album every music lover should own.

Mike and the Melvins – Three Men and a Baby. Something by the Melvins had to end up on my 2016 best of list because, hey, Melvins. But their recent releases are falling flat to my ears. The promise of Basses Loaded, a great concept of many bass players, including the Butthole Surfer’s Jeff Pinkus and Krist Novoselic, playing on many songs, doesn’t deliver. Thankfully this collaboration between the Melvins and Mike Kunka of godheadSilo from 1999 is seeing the light of day. I’ll bet the Melvins never dreamed they’d be on Sub Pop.

The Other Side of the River by Terry Reid. Nicknamed ‘Superlungs’, this gent came close to fronting Led Zeppelin. This is solid early-70’s guitar rock with some country and funk thrown in. It’s classic rock that never achieved classic status.

– Anna Homler and Steve Moshier – Breadwoman and Other Tales. Haunting, percussion driven, minimal music with esoteric singing in a non-language that channels the ether.

TAD’s first three Sub Pop albums. These sound better than ever, and hit the spot like you wouldn’t believe in today’s political climate. In my youth when I heard Behemoth I would think of the stupid drunk motorcycling motherfucker who plowed his bike into a friend’s car at 90 mph near North Gate on Roosevelt, killing one and putting the other into a multi-day coma. Now I think of Trump. You will fall down.

– Julius Eastman – Femenine. Gorgeous minimalism from mid-70’s New York by a queer New York artist. One can’t help think of Steve Reich, but that’s a compliment. I don’t know much about this guy, but I’m glad this is available again.

New to Me

Best music from the past, but discovered in 2016:
– Robert Roth‘s Someone Somewhere. This should be so much bigger than it is. While it sounds nothing like Genesis, for some reason it always makes me think of side 1 of The Lamb Lies Down on Broadway. It’s an urban story (I think) with nefarious undertones, but more important are the songs that tell the story. It took a few listens before they became embedded in my head. Robert went to my high school, and there’s part of me that begrudges someone who grew up so close to me coming out with such a great record – hey, jealousy – but I’m almost 50 and bigger than that, so nice work Mr Roth. Truly. Everyone else, buy this CD and you too will wake up with these songs in your head. There’s not a dud here.

– Prince’s MPLSºUND and LOtUSFLOW3R. I lost track of Prince after Batman and then, after his passing, saw this at the Forced Exposure site. These are his 33rd and 34th studio albums and they are everything one can expect from Prince. Funk, songcrafting, guitar, upbeat, so good. They didn’t seem to get the best reviews when they came out, but they never left my car’s CD player this year.

Fathering by a Music Nerd

As a music geek, one of my greatest anticipations going into fatherhood was influencing my daughter with all the wonderful esoteric and mainstream sounds I’ve acquired over the years. For me, music took hold at an early age, though I assumed it was that way for everyone. Only later did I realize I was one of those unfortunate junkies who can’t get enough and almost gets an endorphin rush from the perfect song at the perfect moment. I couldn’t wait to foster this in my daughter.

This is a story of my attempt to shape a little girl’s musical taste. She’s now an almost-seven-year-old who still likes some of what I force fed her, but she’s turning into her own person, and I couldn’t be prouder. Heck, Taylor Swift isn’t so bad. I still like the Partridge Family, so why shouldn’t I like contemporary teenybopper music? It all starts with what shaped her dad (that’s me) and then focuses on her progression from a toddler, who liked nearly anything played for her (Melvins? Bring it on!), to a big first grader who is now more influenced by her friends and her beautiful innate taste than she is by her dear old dad.

Dad’s childhood music

A vivid memory from around third grade is my parents purchasing a short stack of 45s at the View Acres grade school fundraising garage sale in Milwaukie, Oregon. The records were rubber banded together, their paper sleeves bent and torn, and I had no idea what I was in for. To this day, after wearing them out on my Fisher Price kids turntable, three of those records are still favorites. Whether they shaped me or simply found me is uncertain. Either way they hit a nerve that hadn’t been tapped before and that continues to need stimulation.

These weren’t kiddie songs. Their target audiences were older and I knew it. All of them hit hard, especially Travelin’ Band. It was fast and loud and John Fogerty didn’t sing, he yelled. It sounded primal, made me jump up and down, and I couldn’t play it enough. The Shocking Blue songs, especially Hot Sand, also hit the spot. Its fuzz guitar riff coupled with a sitar and the singer launching into the song the second the needle picked up the first groove made me move and play air guitar wildly in a room decorated with Bill Walton-era Portland Trailblazer newspaper clippings. This Diamond Ring embedded sixties garage pop into my psyche, never to leave, and hearing its melodic tune today invokes a combination of heart-tugging nostalgia and that feeling only the perfectly sweet pop song can bring out.

Around the same time our school choir sang Please Mr. Postman in the style of the Carpenters and Billy Don’t be a Hero, and they entered my tiny collection. I particularly liked the latter (the version recorded by the US band Bo Donaldson and The Heywoods, not the original version released a few months earlier by the UK band Paper Lace), with its military drum and flute march, cool fuzz riff, and story of a soldier headed to his untimely demise. My best friend and I acted out that war story while listening to the song, just like you’d expect a couple young unselfconscious boys would.

While my parents bought me that short stack of 45s, they bore no resemblance to what I heard in the rest of the house growing up. They may as well have given me a toy truck. It was just something to play with, not an attempt share their taste or to assimilate me into contemporary pop culture. The songs grabbed me on their own. As a parent, I wanted to be different and ingrain my kid with what I think is cool. In retrospect and in defense of my folks though, I’ve come to appreciate that John Denver, Cat Stevens, and Dolly Parton, who they inundated my sister and I with on the living room hi-fi in the 1970’s, all put out some pretty great records.

Camille’s Musical Adventure

What would be my daughter’s Travelin’ Band and Hot Sand? I couldn’t wait to find out. I also couldn’t wait to shape and mold her into the perfect mix of music sophistication and low brow cool. “Eh, don’t put too much energy into it. She’ll like Katy Perry before you know it and there’s absolutely nothing you can do about it,” more experienced fathers told me. “Yeah, right,” I thought. This girl will be different. She’s mine and I will influence her. Just you wait.

From the moment Camille could stand on her own and bounce out a toddler dance I regularly boogied with her in our music room, surrounded by a wall of vinyl, after putting records on the turntable I thought she’d like, or perhaps better put, records I thought she should like. I showed her the record jacket, the vinyl, the band members on the inner-sleeve, saw her gaze in amazement at splatter and colored vinyl records, and soaked up her wide-eyed reaction. Like most kids, the beat moved her, and as far as I could tell, my plan was working. She started asking for The Kinks “One for the Road,” mostly because its spine is hot pink so stands out on the shelve surrounded by its neighboring records. I knew that like most girls she really liked pink, but it was for the music I told myself. She also took a liking to Girl Trouble‘s “Letter to Santa,” mostly because K.P Kendall sings, “I woulda wrote him a letter but I couldn’t spell ptthhhhthhth”, that last word being the sound made when you stick your tongue out and breathe out so it flaps between your lips and sprays spittle. I knew that that’s pretty funny to a three-year-old, but she was beginning to understand the simple rockin’ aesthetic of a garage band who’s been around three decades and who revels in their Tacoma, Washington identity while celebrating pop culture with their old zine, Wig-Out!, right?

She asked to see the record covers and asked who the individual members were and became familiar with the faces of the Beatles, Kiss, David Bowie, and more.

As we sifted through some of the more palatable sounds in my record library one band resonated beyond cool colors and funny sounds. The Jon Spencer Blues Explosion, with their indefatigable minimalist beat, melodic and punchy songs, and flamboyant singer, grabbed her. The album that she requested the most is Acme, which makes sense given it’s their peak of garage, dance, and soul. “I want to hear the orange one,” she’d say (not Orange, another JSPE album, but the album with the orange cover, Acme). She asked to see their record covers and asked me to quiz her on who each member is. She could point out Judah Bauer, Russell Simins, and Jon Spencer on all their records, and particularly enjoyed pointing them out on the cover of Crypt Style because they’re dressed like girls. It wasn’t a one album love affair either. She dug Extra Width and Orange as well. I purposefully left out their earliest and rawest material. As great as that stuff is, that stuff probably isn’t particularly palatable to toddlers.

https://www.youtube.com/watch?v=AcOKE2qHs9c
More Camille favorites and adventure in parenting to come.

A Fan’s Notes, or, Why I Write

The Blank Page

The hardest part is the blank page.  With those seven words the page is no longer blank.  One hurdle down…

As long as I can remember there’s been something inside trying to be heard or read.  In my obsessive record collecting youth it was the former.  Records accompanied me home under my collegiate arm, usually well worn by their previous owners, but cheap.  The grooves in the vinyl contained the creative output of (almost always) men and they (almost always) were older than me.  Buried in the pleasure derived from placing the needle on the record and hearing the warm, if a bit poppy and scratchy, sounds was a hidden hope and desire that one day I would be one of the men making music that went on vinyl and that I would be the older person inspiring and making someone happy.

That was over twenty-five years ago.  During that time the dream was never realized. The closest it came involved semi-close brushes two or three times removed from a few folks who for a brief moment had it within their grasp. 

DJ’ing

Four years at public radio station, KCMU (now KEXP), provided a peripheral experience. At KCMU volunteers put together four-hour long stretches of musical collages, resulting in beautiful, rewarding mixes of songs from every genre you can think of. It provided a healthy, creative outlet for which I will always be thankful.  Most volunteer DJ’s weren’t making the music to be heard. Rather, they were the fans who played and exposed it to the listeners. In some cases they were both (see Kim Thayil of Soundgarden, Mark Arm of Mudhoney and other great bands, and Jon Poneman who went on to release music with his partner Bruce Pavitt on Sub Pop records). All were responsible for making it heard over the airwaves and blending the disco with the dissonant jazz with the industrial noise with the beautiful power pop from New Zealand with the enchanting sounds of Africa and more.  Only after leaving did I realize what a profoundly nourishing and creative experience those four years were. These days from time to time I’m able to help out with live DJ’ing at the Sunset Tavern which is always similar fun.

A few years later I enjoyed about a decade of playing bass in an all-improv group and experienced the joy being one of the people who makes the songs.  Sunday evenings in the hot summer of 1997 the music happened.  We had a practice space on Capitol Hill where we met around 7pm.  The chemistry of three or four guys and sometimes a drum machine clicked after two to four cans of cold Schmidt.  I didn’t know what I was doing, but it provided an outlet.  It was a release on the valve to get something out, to get something heard.  Never mind that rarely did anyone ever hear it – live shows happened infrequently – but being there in the present, letting my fingers put together some messed up riff that I never thought anyone would contemplate working with, and having others lay down music on top of it, then hearing it then in the here and now was a rush.  Each session ended with a buzz well beyond anything the beers offered. Today in our later middle-age lives we again gravitate to a practice space a couple times a year to plug in and play with no audience except ourselves and a few cans of Rainier, and for this I’m grateful.

From the improvised band I moved to one who played real songs and a recording actually happened, as did a few shows. However, like countless other bands, this one never rose above the occasional show and halfway decent demo before the flame went out. By the fourth year practice was a weekly boys’ night of beer and playing the same old songs in a dark room.  Sure it was fun, but the potential and fire slowly withered.  And unlike most other similar bands, we were not so young with members in our 30’s, 40’s, and 50’s.

Fast forward to now.  In the quarter-century since I started obsessively carrying home cheap used stacks of records, I became older than nearly all the musicians who I elevated to hero status were when they put out the records that moved me.  Pete Townshend, Ace Frehley, Joe Strummer, Keith Richards, Mark Arm (and several other musicians in my backyard).  I’m pushing 50.  Pete Townshend just turned 26 when Live at Leeds was released, Ace Frehley was 27 when my parents gave me his Kiss solo record for Christmas, Joe Strummer was around 27 when London Calling came out and is already dead by natural causes, and Keith Richards was about 38 when the Stones’ last decent record came out.

The musical urge, while not dead, is fading, along with those who inspired it.  Perhaps one day, like the prolifically creative aged men who I still adorn with hero status (Julian Cope, Jah Wobble, Mike Watt, Buzz Osborne, Lee Renaldo, Fred Cole), something I record will be played by a young kid.  And perhaps it will be an electronic, intangible file rather than a hefty chunk of vinyl.  Perhaps it’s as likely to happen as my 24 year old fantasy of chatting up King Buzzo in downtown Olympia and hearing him say, “Hey, the Melvins are replacing Joe Preston.  Do you know any good bass players?”

As that musical fantasy is beat down with each additional year of wisdom, it cross-fades with the urge to write.  Both are outlets, a way to get something out, to make something that didn’t exist before, hopefully with an audience.  And fortunately the writing urge requires only two investments:  a device (computer, check) and the will (uh, checked, then erased, then checked again in pencil just in case to avoid commitment, then erased, and now once again checked, though digitally so it seems permanent but can be deleted).

A good friend from high school is married to a writer, Sydney Salter.  I congratulated her the other day on accolades she received on a writers’ blog.  She responded saying the hardest part is the empty page.  She wrote, “My guess is that if you’re even thinking about writing, you’re meant to write”.  The voice deep inside me said, “Whoa, how did she know?” The voices on the surface, the ones that are always trying to get out, said perhaps, yes, I can commit to writing.  She also wrote, “Get some words down”.  Destroy the blank page.  Ok, she didn’t say that last sentence. I did.

Well, mission accomplished.  This page is no longer empty.  Some of the voices swirling inside searching for a way out are set free.  A creative outlet is tapped and, like the jamming in the late 90’s, even if it doesn’t receive an audience, it’s still a healthy release and feels really good.

postscript:

  • This post’s title is blatant homage to the Frederick Exley’s wonderful semi-fictional memoir of a man coming to terms with the fact that he will never be the professional football player he thought he could be, “A Fan’s Notes.” Read it.

Blogging – 3 Steps to Restore a Dead Blog

My last post discussed the horror of discovering my blog was dead and the troubleshooting to discover the cause was a database deleted during a power outage at one of my hosting company’s data centers. This post outlines how to bring the blog back to life in three steps.

1. RESUSCITATE THE DATABASE

The first step is to bring the database back from the dead which, in this case, means it had to be recreated from scratch. To do that I took to the Google. One of the first hits was this YouTube video from http://videotutorials4dummies.com/. It is so good at walking a person through creating a database that I would trust the narrator to walk me through an appendectomy. His down-home, southern drawl reminds me of a kind uncle helping his nephews learn how to change the oil in their car. He starts the process by telling the users, “Now don’t be sweatin’ it…” and proceeds from there. The video shows the user where the wp-config.php file is and how to find the blog’s database name, user, and password in the variables DB_NAME, DB_USER, and DB_PASSWORD. From there he shows you how to create a new database through the cPanel with the same database name and username so your blog will pick it up. I believe he advises that you change your password as well. I’ll refrain from more detail because you can get all that from the referenced video. Perhaps eat some bacon and crack a macrobrew while watching because from his voice I picture the narrator as a big fan of bacon and lite beers.

2. REINSTALL WORDPRESS

Upon completion of creating a new database, eyeversonic.com loaded for the first time since the disaster without an error. However, the content didn’t load, so while I made progress, I wasn’t there yet. Unfortunately, I didn’t record the exact message that displayed to include here, but it told me my version of WordPress was out of date and asked if I want to install the new version. Note that it didn’t say “update” or “upgrade.” Without wanting to kill momentum I quickly proceeded with an emphatic affirmative, and then quickly realized perhaps I should have done a little research first. As it reinstalled, I found a few posts about reinstalling WordPress that said it is very important to make a copy of the wp-content under public_html to preserve previous posts. However, a little digging around in wp-content doesn’t reveal any of the content in my blog. Rather, I see folders like “plugins,” “themes,” and “upgrade,” and “uploads.” Other sources say the content is in the database itself, in which case, since my database disappeared, there wasn’t much I could do. If someone wants to shed light on where the actual content in WordPress blogs is stored in a comment, please feel free. For the curious, this post does a good job of demystifying the WordPress database.

3. REVIVE CONTENT

Following the WordPress reinstall, I had a fresh database, a current WordPress installation, and zero content. Earlier in this troubleshooting process I took to the WordPress support forums for help and someone kindly found an archived version of my old blog here. It was then that I realized my blog would be recreated via brute force. This was a blessing and a curse. The blessing is because I was never really happy with the look and feel of the blog so I was forced to revisit its appearance, and the curse is the labor of putting the content back.

The way-back-machine known as web.archive.org saved my hide by preserving its content, and while a bit labor intensive, as the video narrator referenced above would say, don’t be sweatin’ using it to put the blog back together.

  1. Copy a post from the archived version, straight from the browser. There is no need to view source and copy from there.
  2. Paste it into a new post in WordPress.
  3. Modify formatting as needed. In my case this was minimal.
  4. Add the title and any media.
  5. Update all hyperlinks by removing references to their archived version. For example, this link, https://web.archive.org/web/20160109095934/http://www.blaineharden.com/, was modified back to http://www.blaineharden.com/.
  6. Modify the publish date to the post’s original publish date.

To address the visual issue, I found a new theme called Hoffman I like and adopted it. In the past I struggled with the banner image because it felt like it defined my presence and brand. “Brand,” you say? Yeah, go ahead and laugh, but isn’t that part of what creating a blog of writing is about? Hoffman does away with a blog banner image and instead relies on the posts to do the talking, which is perfect. And as an added bonus, it’s free.

My blog is back in the saddle again, and previous lost entries will be reinstated using this technique in the near-term future.

This post is brought to you by:
* BAND TOGETHER: Music from Syria, Iran, Iraq, Libya, Somalia, Sudan and Yemen

Blogging – Troubleshooting a Dead Blog

This is my second post about blogging and regrettably it’s about resuscitating a flat-out dead WordPress site. The ultimate cause is the mystery disappearance of the backbone of a WordPress blog, its database. Hopefully this doesn’t happen to you, but if it does, perhaps this post, which covers diagnosing the problem, and my next, which will cover how to fix it, can help.

The other day I decided to check out my blog after a year-long dormancy. I truly want to write more, so it’s time to start adding more content. It had been so long that I had to revisit my bookmarks to remember the admin site and how to log in. With anticipation I wanted to login, read what I had written to see how it stood the test of time, and start it up again.

THE BLOG IS DEAD, JIM!

I went to my site, and low and behold, nothing appeared except a nasty error message, “Error establishing a database connection.” I assumed this was something that could be easily fixed, especially because I consider myself fairly tech savvy. Not so savvy I can write a thesis about multithreaded C++ code, but modifying code here and there isn’t out of the question. Perhaps a path to the database needed to be updated.

The next step was to Google the error, then get into my admin page and fix it. My confidence took a dip when an attempt to log into the “wp-admin” portion of my WordPress site resulted in another error, “One or more database tables are unavailable. The database may need to be repaired.” Yikes! Fortunately, it provided a snipped of code to enter into my wp-config.php page to allow database repairs. That code is here:

define('WP_ALLOW_REPAIR', true);

After modification of the wp-config.php with this line and a page refresh two buttons appeared, each with instructions. This felt like progress. One button was for the option to repair the database. The other button was for the option to repair and optimize the database. Unfortunately, both buttons resulted in further errors stating various tables are missing and cannot be repaired. Double yikes!

A great page that discusses some of this is here, but my errors unfortunately couldn’t be addressed by its author’s worthy efforts.

After a little more internet searching I realized that something pretty bad happened to my database. The next step was to log into my cPanel at InMotion, where my site is hosted, and poke around. Regrettably nothing easy to fix stood out, and I simply didn’t understand how the site is put together well enough to know what to do.

HELP!

The next step required a call to InMotion tech support. Fortunately, I wasn’t strapped for time because it took almost half an hour of hold music to reach a live person. That gave me more time to try to solve this thing on my own and save face, and time flies trying to solve problems. I want to give the person who took my call big kudos because he listened and legitimately seemed to get my frustration. I explained the errors and he put me on hold a couple times while he researched the issue. In the end, he had to tell me that my site was pretty much fried because the database simply didn’t exist. It was gone. I never backed up my site and there is no cache or trash can from which to recover it. It was wiped way at some point into the ether. The sound of his voice indicated he’s delivered this news before and that he was braced for a tongue lashing. However, I was in tech support many years ago, and I know there’s only so much the bearer of bad news can do.

“So, you’re telling me that my site is pretty much dead and there’s nothing to be done”

“Yessir. I am truly so sorry.”

MAKING GOOD

I also know from being in tech support that angry users who have legitimate gripes can get some compensation. I asked him what could be done to keep me with InMotion given that through no fault of my own my site’s backbone (i.e. its database) disappeared, rendering it dead. He then told me that in January 2017, just last month, one of their data centers suffered a power outage which resulted in some data loss. I was most likely one of the casualties, and all the casualties who called received some free hosting. I was transferred to a customer service person and he kindly gave me six months of free hosting and reduced my renewal price by 15% for when it due in early 2018.

I don’t want to dig on InMotion. Sure one of their data centers had an issue, but I have no idea how much control they have over that. In light of the situation, they handled this professionally, and the two people I spoke with sounded legitimately sorry. Shit happens, move on. However, I will say I am extremely fortunate that my site is so minimal. A business site would be hurt much more than I. Though a team managing a business site should be smart and risk averse enough to create backups. I will do that going forward. Lesson learned.

In my next post, I will share how I rebuilt the database and got my old content back.

This post is brought to you by:
* Les Big Byrd - They Worshipped Cats
* The Beatles - Blackbird